
User is required to be an Administrator in QB, be able to log into the Intuit portal and, if needed, receive access code on cell phone (or email).
Step One: For each online QB file, follow these steps:
- Go to Main System Setup (MSS)
- Tabs on the left - Program link
- QuickBooks subtab
- Select toggle action for QuickBooks online
- Click add company
- Select the QB version that you purchased (Most people should pick "Basic" here unless you have Payroll set up)
- Click Get Authorization Code
- Sign in to your Intuit account
- If Intuit does not recognize you, you will be sent a text, follow the instructions
- Once logged into Intuit, find the authorization code and copy/paste to the screen below.
Step Two:
- Find Realm ID and copy/paste it to the screen below.
- Add your company name
- Then click Authenticate.
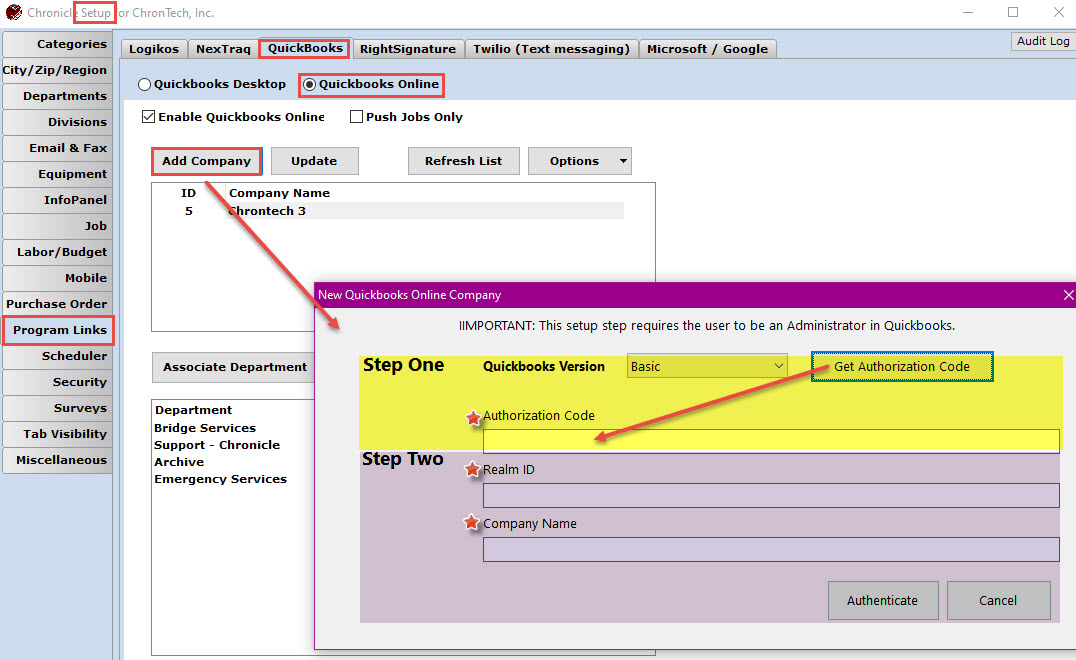
*Realm ID – “The realm ID is assigned to a company by Intuit when a QuickBooks Online user creates a company. QuickBooks Online displays the realm ID as the company ID on the Billing & Subscription page of Account and Settings for your company.”
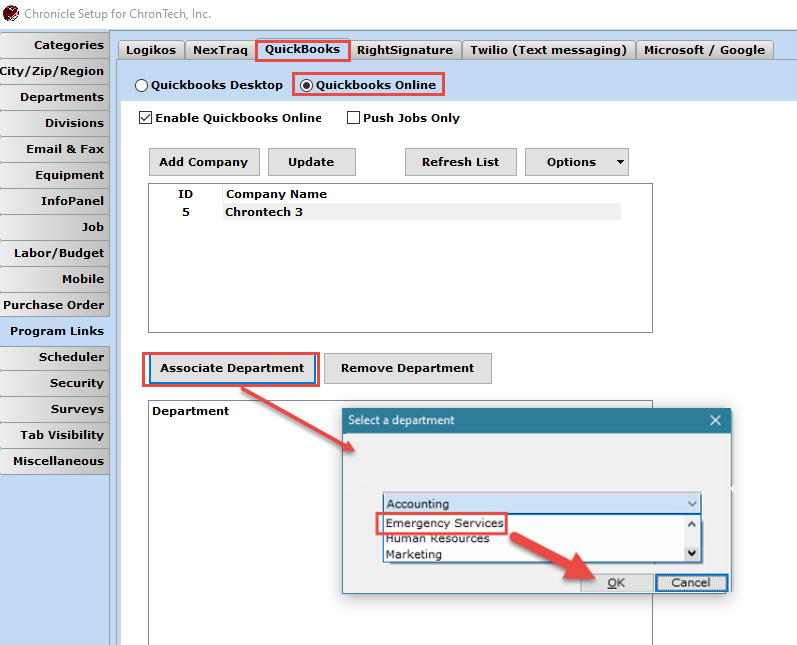
Step Three:
Click on the Associate Department button.
You will see a drop-down with possible choices. Associate ONLY production departments. If you add a production department to Chronicle later, remember to come here and associate it with the QB file. If you have more than one integration, be sure to select that company name before associating departments.
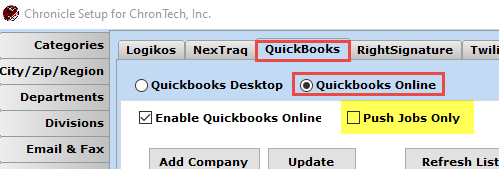
Step Four:
Next, you can decide if you want to only push jobs by checking the box at the top of the setup screen. Otherwise, the whole bridge will run by pushing jobs and pulling financials.
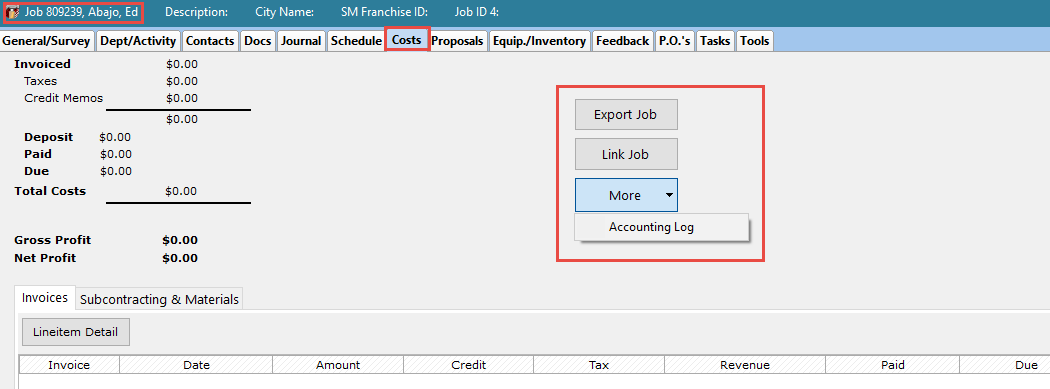
Going forward, when a job has one of these production departments (set to active), it will push the customer and job to QB. If you need to do a manual job sync, follow these steps:
- Pick a job
- Go to the job cost tab. You will see three buttons:
- Export job - Runs a manual job push
- Link job - Use this to link the existing jobs to the QuickBooks job by searching for the customer in QuickBooks
- More - lets you view the Accounting log file
Comments
0 comments
Please sign in to leave a comment.